Kitchen Cabinets: Drawers |
|
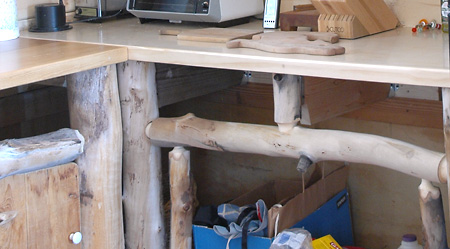
The Openings for Two Drawers
These two openings will receive drawers. The 2x6 horizontals under the counter were made large so I could freely attach hardware for the drawers.
|

|
A Drawer
May 08
I made the drawers out of scrap strand board, salvaged from the building of the cabin. I cut the pieces on my band saw. I glued them and then nailed them with my pneumatic nailer.
|
|
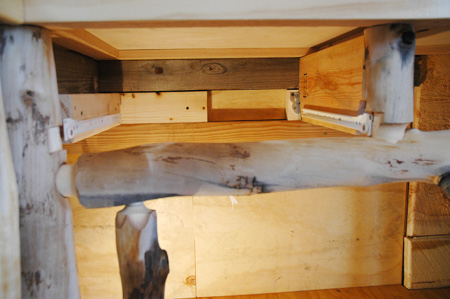
Learning by Doing: the First Drawer
May 08
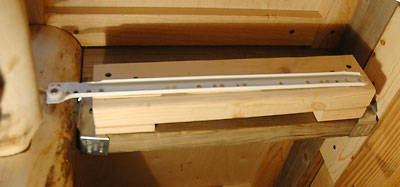
I applied the drawer runners directly on the 2x6 horizontals that I had built into the counter. It took a long time to install the the hardware. I had to build a custom piece of 2x4 (see below) and shim it repeatedly, until I had both runners parallel and fitting properly.
Fitting this drawer was an example of the occasional inefficiency of improvisational carpentry: learning entails mistakes. Installing drawers after applying the counter top also forced me to work from below in awkaward positions. (The compensation is the freedom of breaking a big job into smaller, unscheduled projects. I was able to use the counter for three months until I got around to making the drawers.) The finished drawer works fine. But it took a bit too long to fit.
|
|
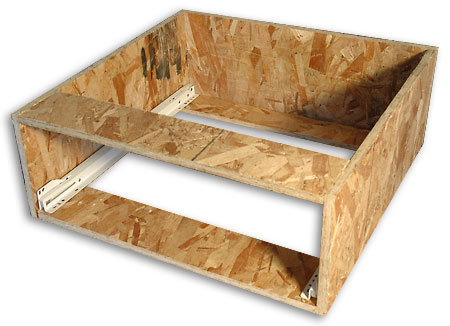
Applying the Lesson: the Second Drawer
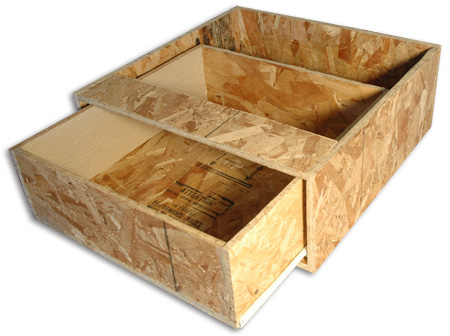
Invention of the "drawer-and-box"
I decided the best way to create and install a drawer after one has already made the counter is to create a drawer-and-box assembly. After this assembly is completed, the box installs quickly and easily.
So, I made a box that fit in the counter cabinet's opening. Then I made a drawer custom-fit for that box.
|
|
Drawer and Box
May 08
The beauty of the drawer-and-box is that one can work away from the counter cabinet, standing at a normal work bench. Everything can be worked out in comfort. It becomes easier to make the drawer hardware work optimally.
|
|
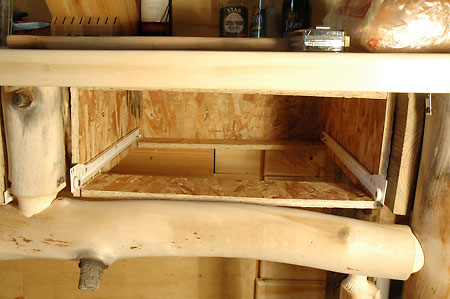
The Box Installed
May 08
The box fits into its designated space. Four screws hold it in place. It was installed quickly.
|
|
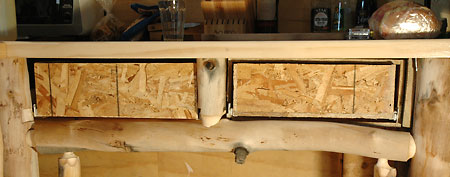
The Drawers Installed
May 08
Later, I removed the drawers and painted them.
Next, I will create the twig faces to cover up the strand-board drawers. |
|
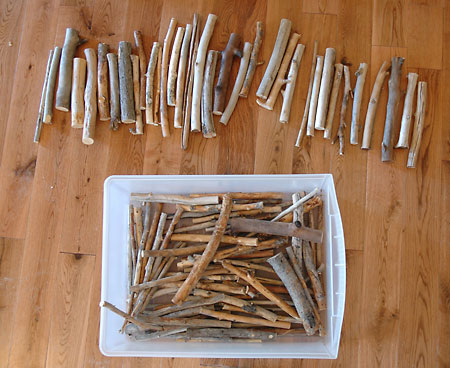
Twigs
July 08
I collect branches and twigs while hiking in Colorado and Utah. I choose them for their color and texture, favoring gold-colored pine, pale-yellow beaver-stripped aspen, golden willows from the desert, and a variety of aspen twigs (bone, orange, brown and silver). I also had some elm & maple twigs from city trees, pine with complex beetle carving, and some pale golden twigs from the Santa Catalinas above Tucson.
I cut them all to a uniform length, just a bit longer than the height of the face boards.
|
|
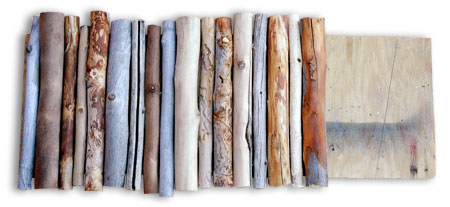
Gluing the Twigs onto Plywood
July 08
I made a plywood backing board by my usual method: I cut and fit cardboard patterns for the two openings; I then applied the pattern and cut the board.
I choose, trim and glue the twigs. I start near the center and work toward the ends, picking twigs that contrast in size, color, and texture. Fitting sometimes requires trimming the twigs with the bandsaw, to remove protrusions, or to flatten the backside. The twigs snug very close together.
I use two glues: construction glue in the middle, and hot glue on the ends. The hot glue fixes the twigs fast, allowing me to work with the twig face boards while the construction glue is still drying.
|
|
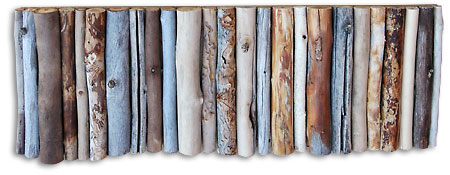
Triming & Fitting the Twig Face Boards
July 08
After the twigs are all in place, I place the board face down on the bandsaw's table and trim off the excess twig, following the edge of the plywood backing board.
Next I fit the boards to their openings, trimming away portions of the twigs and board until it fits comfortably. |
|
Applying the Face Boards
July 08
This step is remarkably simple. I apply construction adhesive everywhere except the left and right ends of a drawer's front side; there I apply some hot glue. Then I press the twig face board into place and hold it there for 30 seconds.
|
|
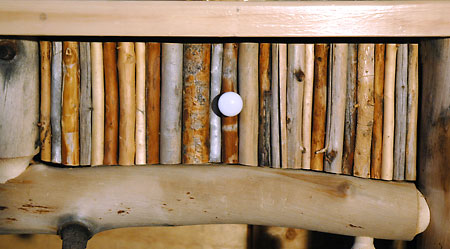
Apply Drawer Pulls
July 08
I locate and drill the holes. It is necessary to make long bolts from thread stock to replace the short bolts that come with the drawer pulls. Then I apply the drawer pulls.
|
|
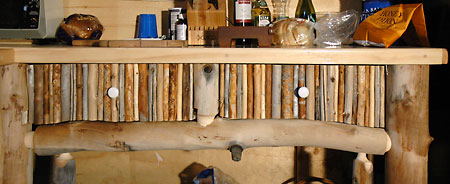
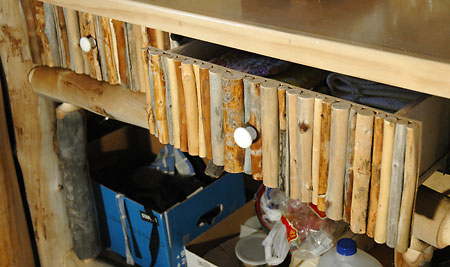
Completed
July 08
The drawers are done. The kitchen linens now have a home.
There is more to come...
Stay tuned
I made and installed the last two cabinet doors. I will be adding three more drawers. |
