Exterior Railings
|
|
|
Aspen Railings
A local resource
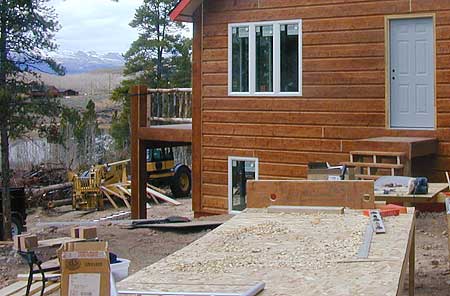
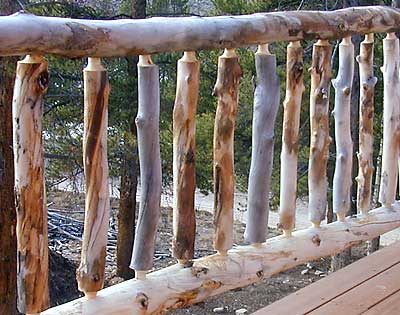
Early in the design and planning process, I took on the task of building the railings, using standing dead aspen trees. In the cabin's neighborhood, the dead trees have a wonderful variety of colors. Dead aspens are usually a silver-gray color. But have I found many that were much lighter, varying from a shiny bone color, to oranges and bowns, "painted" naturally in patches and spiraling streaks.
|
|
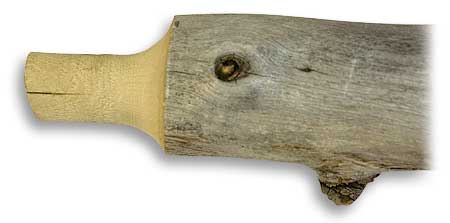
Balusters & Tenons
Balusters are the vertical poles between railings. The smaller, carved ending is called a tenon. Traditionally they are made by carving and cutting, using saws, knives and spoke shaves. My builder told me about tenon cutters...
|
|
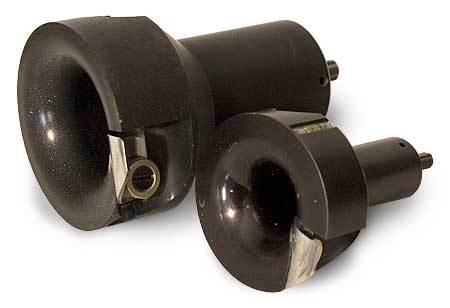
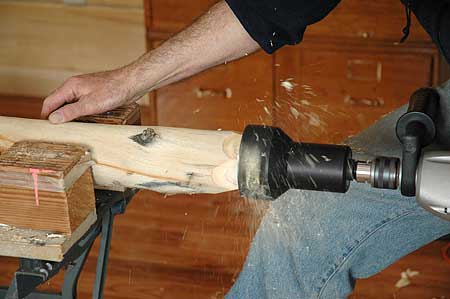
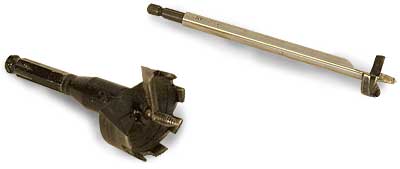
Tenon Cutters
These are the two tenon cutters I used. One makes a 2" tenon; the other makes a 1" tenon. They are a Veritas product from Lee Valley tools. They install in a 1/2" drill. When applied to the end of a log the stainless blade cuts off spirals of wood until you have a tenon of the appropriate size and length.
It takes a bit of practice. And your log must be held firmly; I customized a Workmate bench to become a large vise, using wooden blocks attached to the Workmate's surface. My Workmate was rescued from a dumpster.
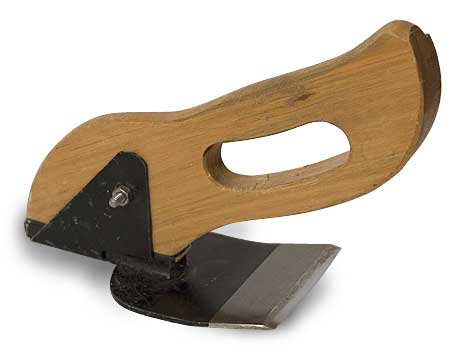
On the big 2" tenons, I found it helpful to remove much of the wood using less subtle tools before apply the tenon cutter. I used first a hand adze (from Lee Valley). Later I purchased a band saw to make my window and door trim; it made quick work roughing out the tenon. Then the cutter would shape it up much faster.
|
|
Work Table & Templates
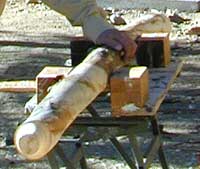
To make the railing sections I made a 12' long table out of particle board and 2x4's At one end you can see a template with two 2" holes. This template was attached to the table. A second template was unattached. A third template allowed me to take a fully assembled railing up to the deck to check the fit.
All the logs were harvested using the 24" buck saw that you just barely see on the near end of the table.
|
|
Making & Fitting the Parts
First I made the two large horizontals. They are between 3.5" and 5" in diameter logs. They have 2" tenons cut on each end.
|
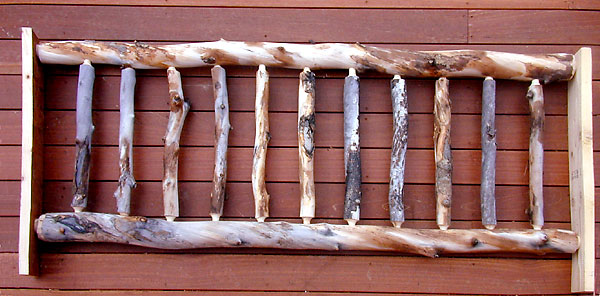 |
Making & Fitting the Parts
I measured and pencilled marks for the placement of the balusters 1" holes along the railings. I used a string guide the line of holes. The logs wiggle in both y and z axes, relative to the plane of the work table. One has to rotate the logs before marking the holes in order to make the best compromise between practical shape and the beauty of the log's surface.
I drilled the 1" holes, using a depth gaugue made out of a piece of pine root to keep the holes at a standard depth.
I started making the balusters, fitting them one at a time. First I determined the length of the individual baluster. I chose the wood and cut 1" tenons. I fit each baluster, removing and then replacing the unattached template at one end of the assembly.
Sometimes you have to fit the baluster a couple of times before it is the proper length. As the number of finished balusters increases, and the previously finished balusters fall out during assembly, the task of reassembling the baluster increases in scope. Patience is required.
Each baluster must be rotated to optimal position, to compensate for mismatches in the centerlines of each baluster's two tenons. Eventually the railing's fit is complete.
|
|
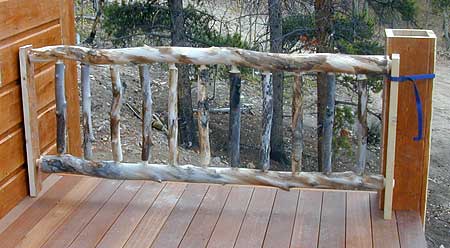
Fitting the Railing to the Cabin
The templates allow one to carry the assembled railing to its location and test its fit. If it is too long you have to remove more wood with the 2" tenon cutter. Luckily I never made one too short.
After I knew that the assembly fit its location, I took it back to the big table, dissassembled it, placed construction glue in the holes, and reassembled it. Then I was ready to install the railing.
|
|
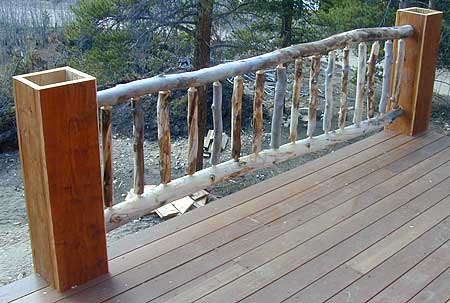
Installing the Railing
Using my hole templates, I located and drilled 2" holes for the horizontals' tenons. The pillar boards with the holes were designed for removal. I attached them to the railings. I replaced the whole assembly into the deck pillars, replaced the screws. Done.
For the railings that attached to the cabin wall, I chose not to drill into cabin's planks. I made boards matching the pillar's boards, and screwed these into the cabin walls. This design was more elegant visually. It repeated the form of the pillars. And it protected me from user error in case I drilled the holes improperly.
|
|
Finish
Initially I finished the aspens with clear Weatherall UV Guard. This is an acrylic wood finish.
But the aspen is a light and porous wood. And the upper horizontal surfaces appeared to be aging faster that the vertical surfaces. So last ssummer I started varnishing the logs with a water-based Varathane, and it seems to be better at protecting the horizontal members. The verticals do fine, as they do standing dead in the woods.
The cabin's milled-fir planks are coated with a brown version of UV Guard. I used a clear version on the sofits, and on the deck's mahogany boards. I used the clear UV Guard to refresh the fir extereior planks, which take a beating in our high-altitude sun.
|
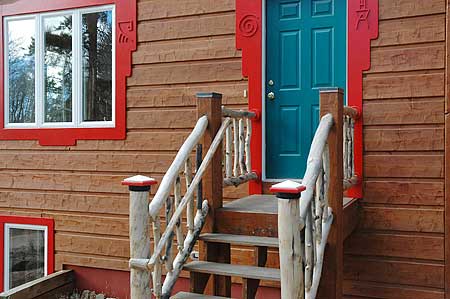 |
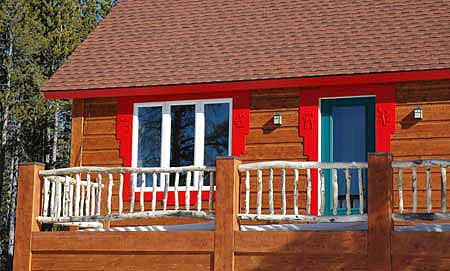
Entry Stair Railings
These railings were a challenge for me. I had to make careful measurements and drawings to figure out how I was going to set the balusters. Ultimately I made a large template out of corrugated carboard to regulate the angles of the balusters.
The builder had built the landing, its squared verticals, and the stairs. I set vertical aspens in concrete. Orginally their painted caps had small wooden spheres on the red squares. This design was flawed: moisture collected on the spheres and flowed down to where they joined the red squares. The spheres rotted. So I replaced them with roof-shaped white caps. They seem more stable, though I miss the spheres.
|
