Kitchen Cabinets: Bottle Cap Medallions
|
|
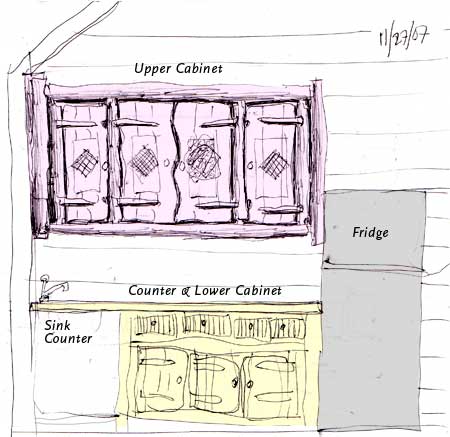
Fridge-side Cabinets Drawing
The Idea
You can see the rough indication of diamond-shaped decoration on the upper cabinet doors. I had the idea to add bottle-cap medallions to the upper-cabinet doors.
|
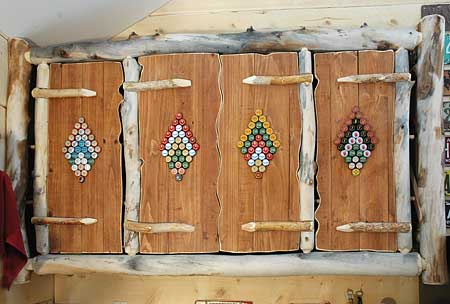 |
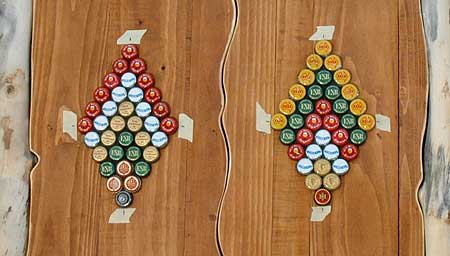
The Medallions: Installed
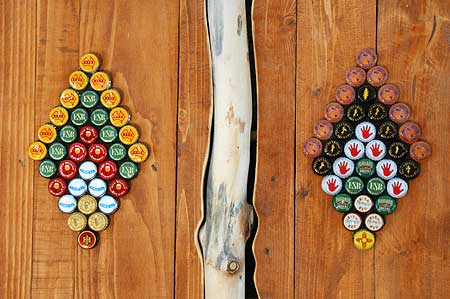
I have made five of these medallions. The fifth is located on the end panel of the cabinets, out of view on the right.
Click here for the Cabinets page. The cabinet doors are made of recycled printer paper-top-pallet wood.
|
|
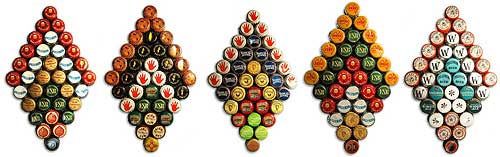
The Medallions
|
|
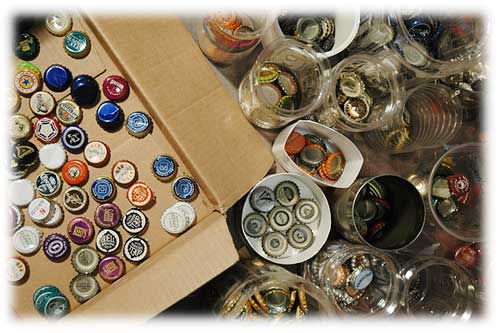
The Bottle Caps
I have collected the caps for many years. I have sorted them out by color, keeping them in plastic bottles and jugs whose tops had been cut off. As I worked on making the medallions I continued sorting the caps, isolating batches of pure, matching caps.
The box on the left holds small-quantity caps, rare caps, or caps of special colors.
|
|
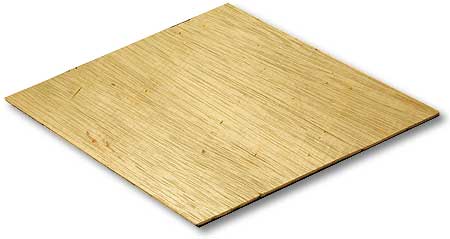
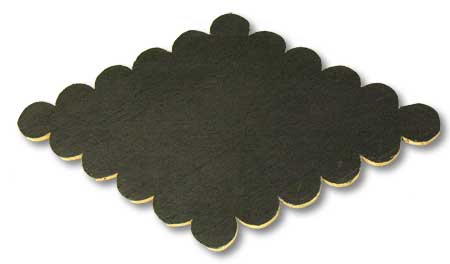
Substrate
After much prototyping I came up with my design: a diamond shape. The circle of a bottle cap naturally tiles into patterns of equilateral triangles. My chosen design will be chevrons laid into two equilateral triangles.
I also decided to build the medallion as a separate object, instead of applying the caps directly to the doors. Since the cabinet doors are not predictably square, this allows me to place the medallions on the door AFTER the doors have been hung. That way the medallions can all be properly aligned. It also permits freedom in choosing which medallion goes where.
|
|
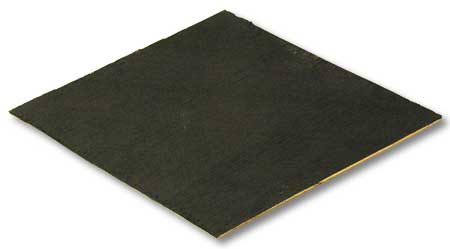
Darken the Background
I painted the diamonds black.
|
|
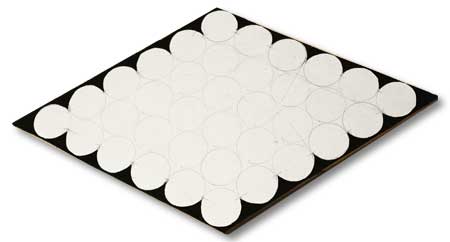
The Drawing
I made a paper drawing using a circle template. I tested the drawing with real bottle caps.
|
|
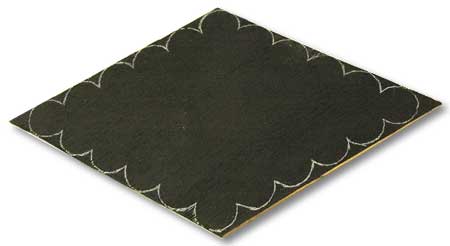
Trace the Drawing
I used a white pencil to place the edge of the drawing.
|
|
Cut Out
I used a scroll saw to cut out out the substrate.
|
|
Gluing Brackets
Applying the bottle caps proved to be a challenge. I did not want to nail them, the classic strategy of bottle-cap vernacular. I preferred to keep the top inviolate.
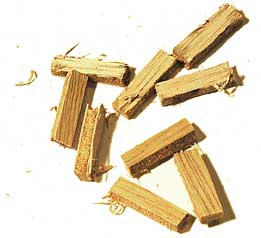
I tried various glues and discovered that nothing seemed to stick to the plastic liners that all bottle caps have.
I noticed the plastic liner does not extend to the crenilated sides of the caps. So I made these small wooden brakets wide enough to span the cap. Thus I could achieve a good bond between the wood bracket and the exposed metal inside the cap.
|
|
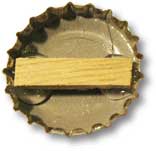
Gluing the Bracket
Two dabs of hot glue hold the wood bracket in place. The cap may then be applied to the substrate by applying glue to the wood bracket.
|
|
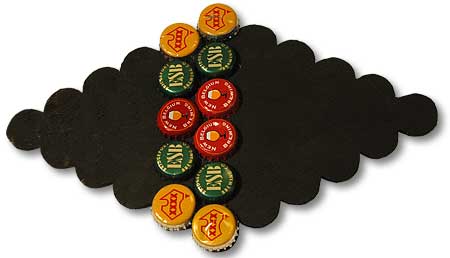
Applying the Caps
Because the caps are made of different materials, they deform differently when each bottle is opened. Thus it is hard to place caps perfectly. Sometimes I flatten badly bent caps, using a dowel fragment and hammer to tap the cap flat from the backside.
So, when it comes time to glue the caps, I start with a central line of caps. This process pushes cumulative error outward and evenly to the edges. The alternative is to start at an edge; but this compounds error, resulting in a big overhang on one side and no overhang on the starting edge.
Close-ups of the fiive medallions are below.
|
|
Applying the Medallions
The medallions are glued onto the cabinet doors. I use tape to locate and square up the placement of the medallions.
|
|
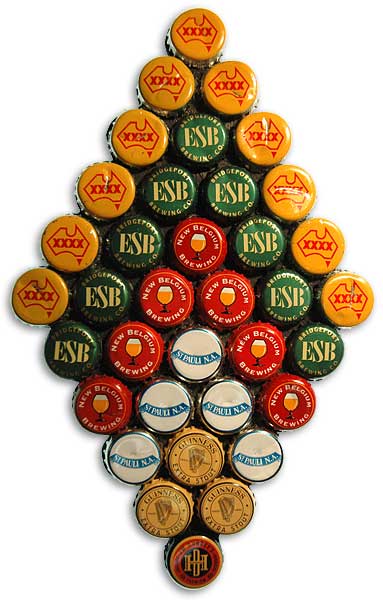
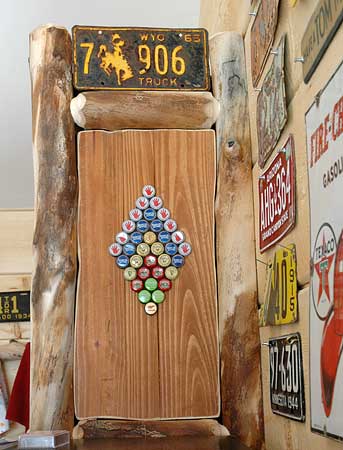
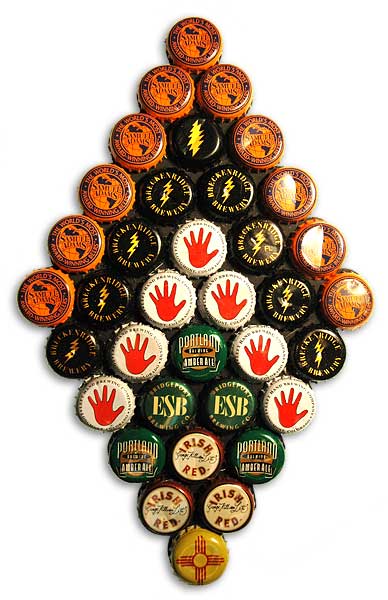
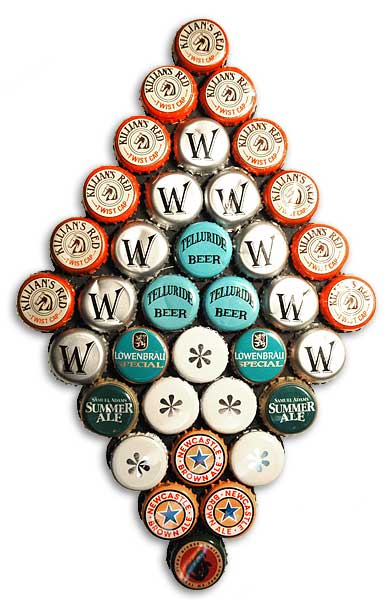
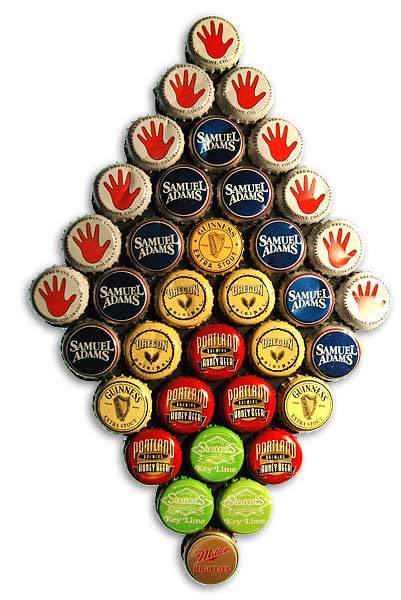
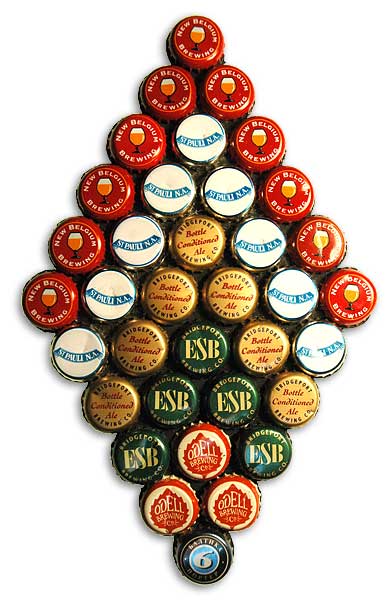
Close-ups of the Five Medallions
This is the end panel of the upper cabinets.
|
|
|
|
|
 |
|
