Kitchen Cabinets |
|
|
Agressive Rustic
A Work in Progress
Kitchen cabinetry represents a lot of complex woodworking. Proper modern cabinetry requires precision work, applied with a vast array of power tools in a well-appointed workshop.
Not having the uninterrupted time, the space, or the budget for regular cabinetry, I decided instead to build according to an imprecise, improvised and sculptural aesthetic, which would make up for its imprecision in an overall charm.
I am still working on these cabinets. I just finished adding two drawers to the fridge-side cabinets. Next I will put doors on below the fridge-side counter. Later, I will add three more drawers to the remaining counters.
I did have to make drawings, samples of which are shown below. |
|
|
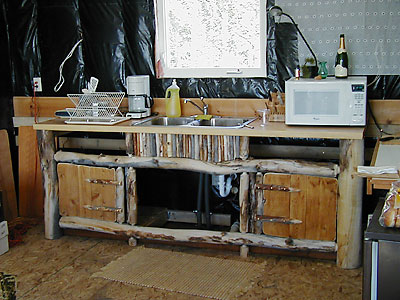
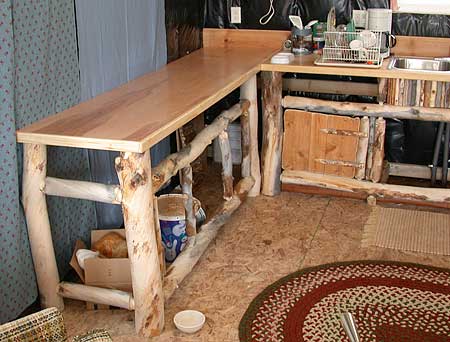
Sink Side
November 2004
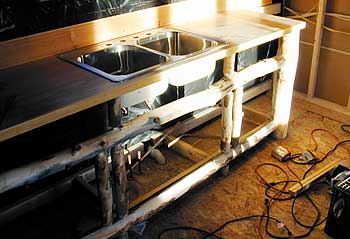
I made the counter top in the city and brought it up. It is 3/4" birch-veneer plywood with pine trim along the front. It has lots of varnish on it. I built the aspen structural facade using two 5" verticals at either end and two 3.5" horizontals. Thinner logs are made into balusters and also small verticals to separate spaces for drawers and a fascia board in front of the sink.
You can see the placement of three lines of 2x4's aginst the wall. These will hold, from top down, the back of the counter, the supports for drawers, and a floor to the cabinet that is slightly above the cabin floor.
 |
|
Adding Parts
January 2005
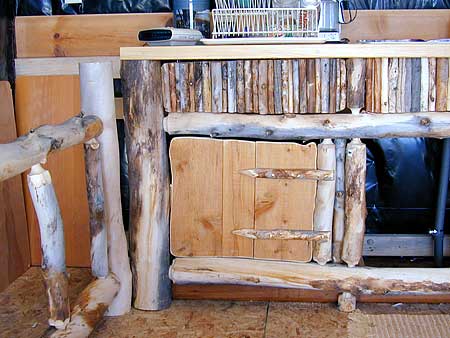
I made a twig-covered panel to hide the sink's bottom. Holes left and right will eventually get drawers.
Two of the doors have been attached to loose-set rotating balusters. |
|
Recycling Wood
January 2005
The doors are made of wood from paper palettes recycled from a printer's factory: large sheets of paper are shipped on fork-lift palettes; a cover of thin boards is placed on top. I reassemble the cover boards for my cabinet doors. They have two horizontal boards, also taken from the cover, on the backside. I bolt the hinges through these horizontals. The doors are stained with the same Weatherall UV Guard I used on the exterior planks of the cabin.
Using carboard from boxes, I made templates for the doors' shape. I cut out the doors with a jig saw and fit them by a process of trimming and cutting. When the door fits I apply my belt sander around the edges, revealing the pale wood.
The hinges are made from pine twigs gathered while hiking. They have complex patterns carved in by beetles. I shape the pointy edges with the bandsaw. I cut notches into the balusters, using a japanese pull-saw and chisels. Then I bolt the hinge and door together with brass bolts.
Last of all, I install wooden door stops on the inside of the big aspen logs.
Click here to see the details of making and installing the cabinet doors.
You can see that the first drawer has been installed above the cabinet door. This drawer was made of particle board scraps. It was painted. It is hung on single-central-runner hardware. After the drawing was working, I attached the twig panel.
|
|
|
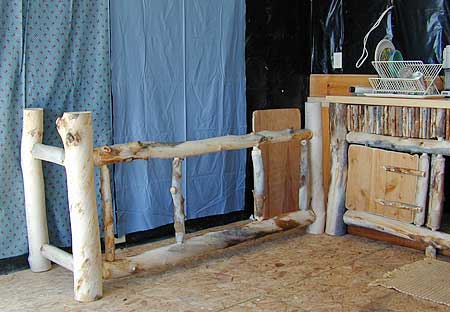
Stove-side Framework
January 2005
The second counter is in the works. You can the aspen framework.
You can also see one of our transitional wall coverings. We hung some cloth remnants we had inherited in an attempt to soften the influence of the shiny black-plastic vapor barrier. |
|
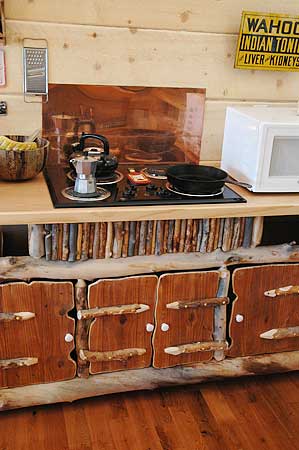
Stove-side Counter
March 2005
In the city, I built the second counter. I installed the second counter and, later, installed a stove top. |
|
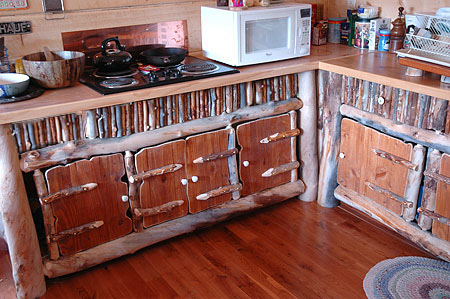
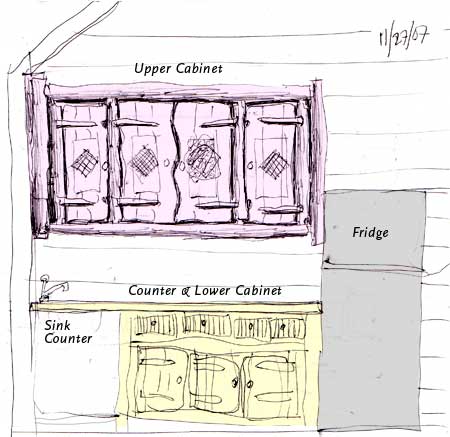
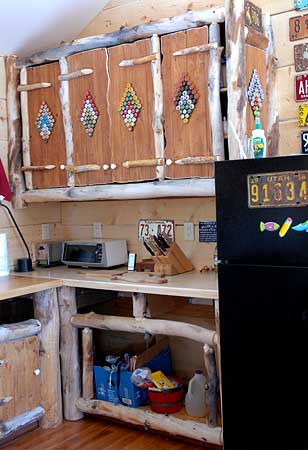
Fridge-side Cabinets
November 2007
Two years passed: I had to put planks on the walls, oak on the floors, railings on stairs, and pass a building inspection before I got to continue the work on the cabinets.
The top photo on this page shows that I was able to add a stove-top, some doors and some twig panels to the cabinets.
Next I worked on the fridge-side cabinets.
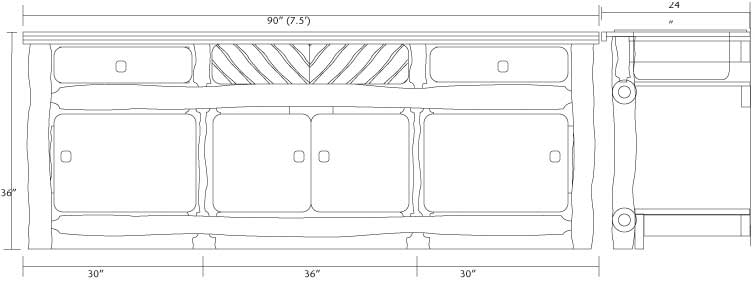
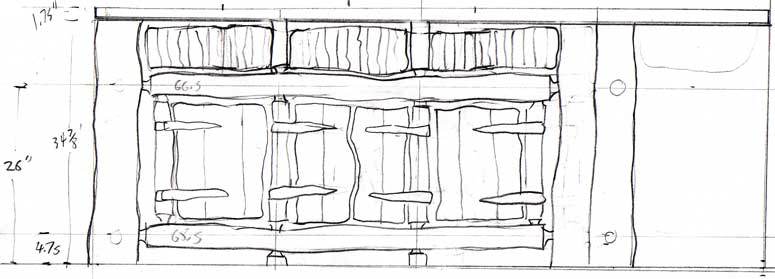
In this drawing you can see that the upper-cabinet doors have a diamond-shaped decorative panel. These have been made with bottle caps. |
|
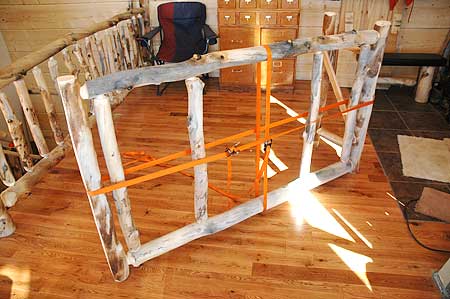
Frame of Upper Cabinets
November 07
This is the framework of the upper cabinets. This will be attached to the walls, bolting into the studs. The only shelves that will be supported by this framework are on the bottom and the top of the structure. Shelves inside the cabinet will be supported on brackets attached to the walls studs.
The doors will be made from the same paper-palette-top wood used in all the other cabinets. |
|
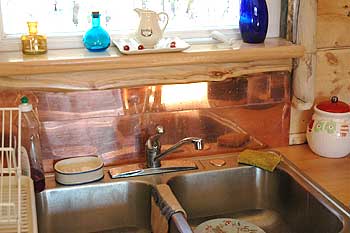
Copper Splash Guards
November 07
I was lucky enough to be visiting a sign supplier when he was cleaning up for a move. He offered me some very thick scrap copper. I glued it behind the stove top and the sink.
|
|
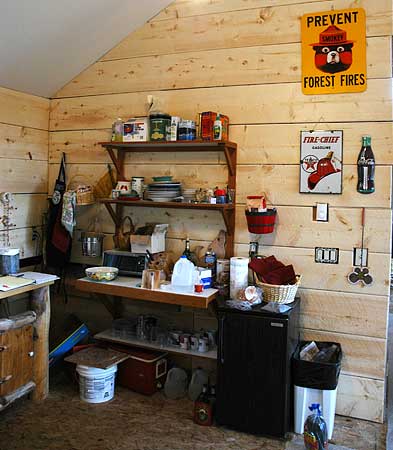
Fridge-side Wall, Temporary Solutions
May 06
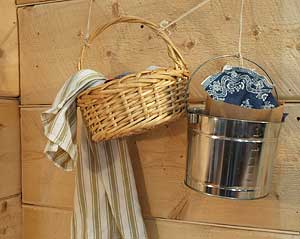
The shelf/desk unit has had many lives in our household. From the fall of '04 until March, '08 it was a vital part of the cabin kitchen. We also hung baskets and pails on the wall to provide additional storage.
|
|
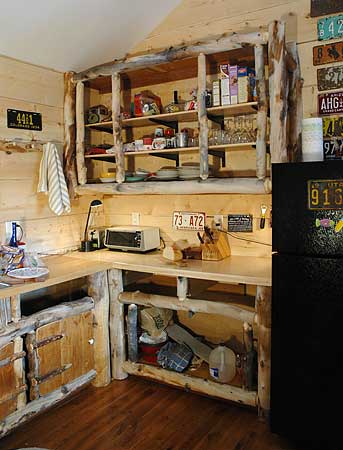
Fridge-side: Counter & Upper Cabinets
March 08
I built the support for the new counter. I made the counter in the city and brought it up a few weeks before. I installed the upper-cabinet framework and hung shelves. The two internal shelves are supported by the wall and its studs. They were made with leftover portion of the birch plywood 4x8 I purchased for the counter top.
For a more detailed view of building these cabinets, click here. |
|
Fridge-side Upper-Cabinet Doors
April 08
I made the cabinet doors in my city studio. I brought them up, made new pine-twig hinges, and then installed the doors. I also installed the bottle-cap medallions for the upper-cabinet doors. I had made them in the city.
|
|
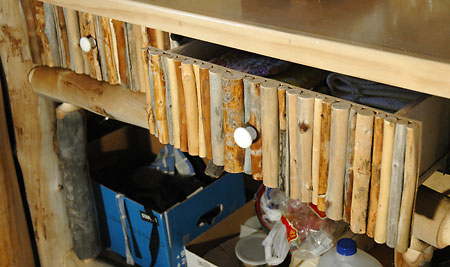
Twig Face Drawers
July 08
I made drawers from construction scrap and added twig faces. Click here for details on making the drawers.
|

|
Fridge-Side Lower-Cabinet doors
August 08
I made and installed the lower-cabinet doors.
|
