Kitchen Cabinets: Installing Doors |
|
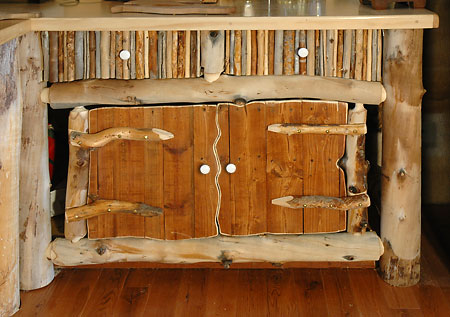
The Doors
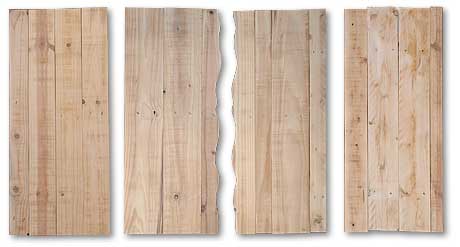
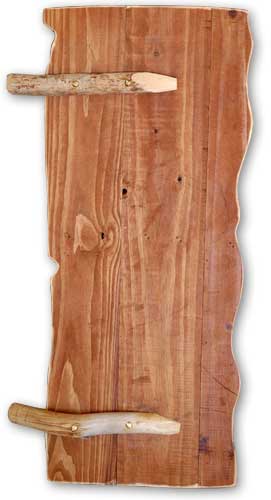
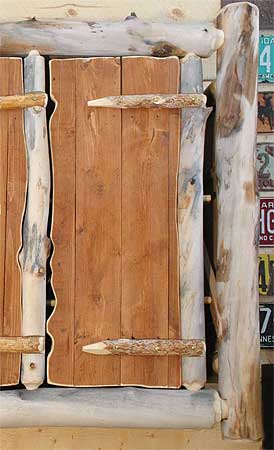
The doors are made of wood from paper palettes recycled from a printer's factory: large sheets of paper are shipped on fork-lift palettes; a cover of thin boards is placed on top. I reassembled the cover boards for my cabinet doors. They have two horizontal boards, also taken from the cover, on the backside. I bolted the hinges through these horizontals.
I knocked apart the palette covers with a hammer and screw driver. I pulled out all the large staples that held them together. Then I sanded the boards to remove dirt and furry wood fiber. I did some finer sanding, but did not seek to make the boards perfectly smooth.
I made the wiggled cut for the central pair by cutting one board before assembling the two doors.
|
|
Staining the Doors
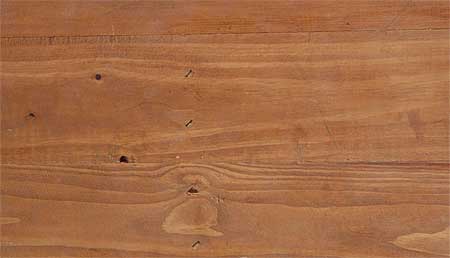
The doors are stained with the same Weatherall UV Guard I used on the exterior planks of the cabin.
The stain does two things that seem opposed. It bring out the woods grain, but it supresses the color contrasts caused by sanding over the original saw markings from boards' rough milling. I'm always amazed at the transformation of throw-away wood into handsome kitchen cabinets. |
|
Preparing to Shape the Doors
Making the Carboard Templates
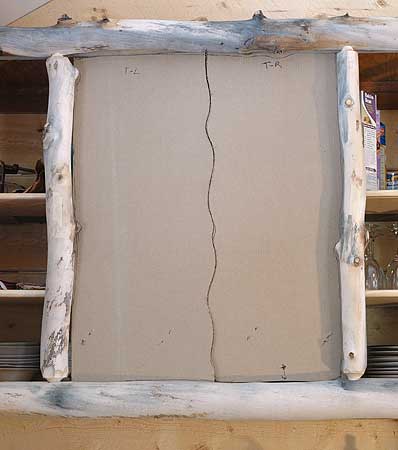
Using corrugated carboard from boxes, I made templates for the doors' outer-edge shape. I place the cardboard into the log frame, and then trace the shape. I cut out the shape using my bandsaw, which seems like overkill, but is simply easy. |
|
Shaping a Door
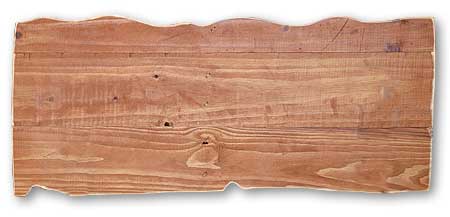
I cut out the doors with my bandsaw and a jig saw. I fit them by a process of repetitive trimming and cutting. When the door fits I apply my belt sander around the edges, revealing the pale wood.
I also make adjustments to the edges of the outer two doors; they must accomodate what happens when the central doors swing out, bringing their twig hinges into the outer doors' edges. |
|
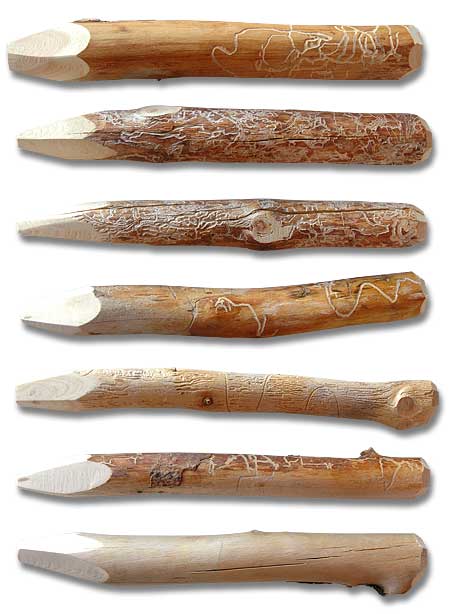
The Hinges
The hinges are made from pine branches gathered while hiking. They have complex patterns carved in by beetles. The backside is cut flat with the bandsaw. I shape the ends with the bandsaw and sand them.
The pine twigs are quite hard, and make a solid hinge.
I had a good supply pine branches saved up. But one week before I made these hinges, I happened to find a bunch of short twigs that had wonderful color and beetle-carved surfaces. All the hinges for these cabinets came from that gathering. |
|
Bolt on the Hinges
I locate the hinges on the doors, mark the bolt holes' locations and then drill the holes. I bolt the hinge and door together with brass bolts.

|
|
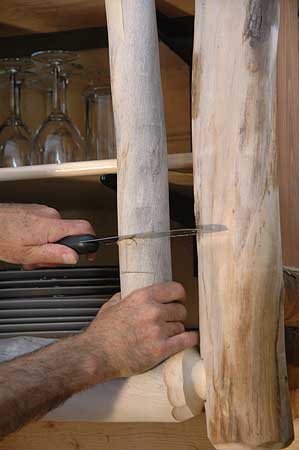
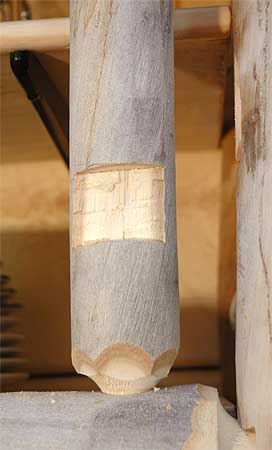
Cutting into the Balusters
First I note the rotational position of the hinge-balusters. When I made the log frames and balusters, I placed tape on the chosen front side of the balusters, choosing and marking the plane of the closed door.
I place the door and its hinges against the baluster and draw horizontal lines where the hinge twigs will cross the baluster. The cuts I make will be guided by the front-plane tape guide. Using a japanese pull-saw, I cut into the balusters. |
|
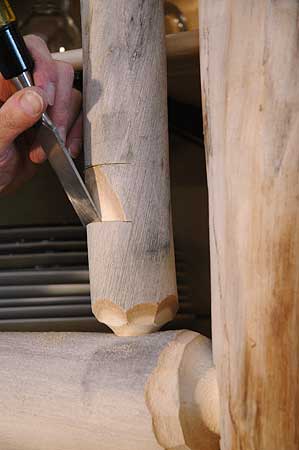
Carving the Balusters
I carved out the hinge slot using a chisel and hammer. |
|
Finished Hinge Slot
|
|
Attaching the Door
The twig hinges have been bolted to the doors. I place the door, sliding the twig hinges into the slots. I drill through and then bolt the hinges onto the hinge-baluster. The door is attached. |
|
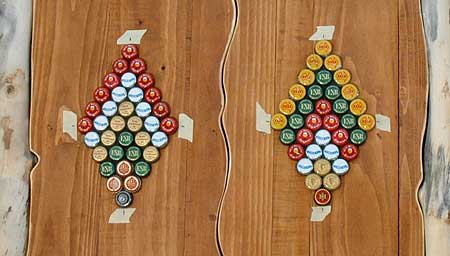
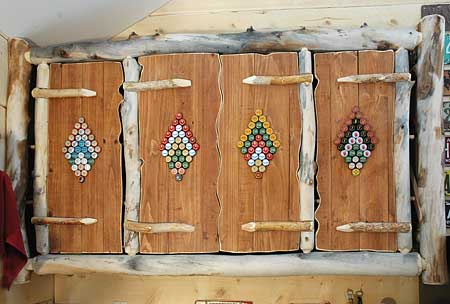
Adding the Bottle-Cap Medallions
The medallions are glued on. Click here for more on making and installing the medallions. |
|
Fridge-side Cabinets
The Upper Doors
|

|
Fridge-side Cabinets
August 08
I have installed the lower-cabinet doors. Drawer installation is detailed here. |
|
Fridge-side Cabinets
August 08
I have installed the lower-cabinet doors. Drawer installation is detailed here. |
