Kitchen Cabinets: Construction Details
|
|
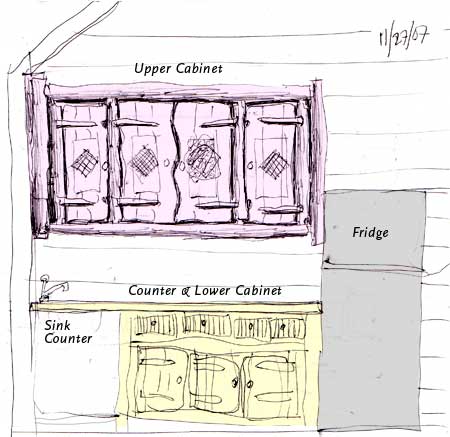
Fridge-side Cabinets
The Sketch
To prepare for this weekend of cabinet building I had already made the counter top in the city. It is 24" by 72". I had to buy a 4'x8' piece of birch plywood. From the remainder I made and varnished two shelves, one 15" wide and another 9" wide. That left me with one 24" x48" piece of birch ply. It would become part of the bottom of the upper cabinet.
|
|
Counter Leg
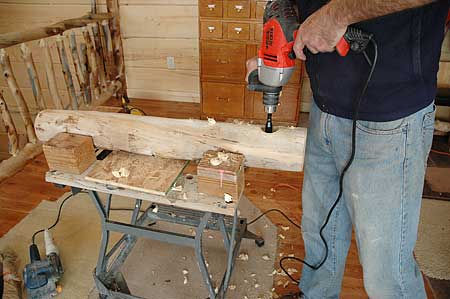
Last fall I had harvested a fine tree. I used only a portion of it to make the three support legs of the lower counter. The legs are 4.5"-5" in diameter.
Here I am cutting a two-inch hole, which will hold the horizontal member tenon.
You can see my recycled work-mate bench. I attached four large blocks of wood to hold logs. They have foam protective pads made from a recycled yoga mat.
|
|
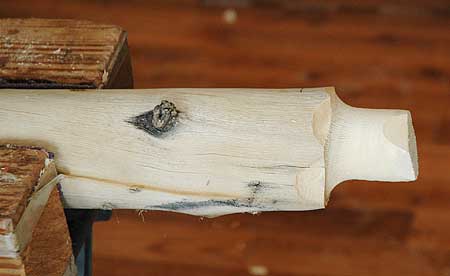
Tenon Cutting
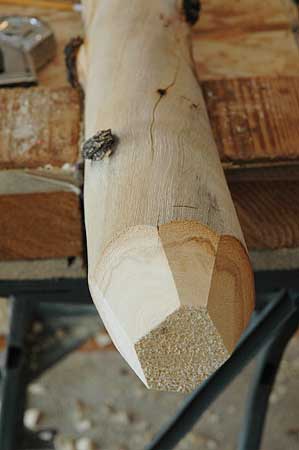
Preliminary Cut
To make the tenon-cutter's work easier, I shape the end of the of the log using the bandsaw. I have to do this twice. After starting the tenon, I cut off more and then complete the tenon.
This is a 3" log. It will become one of the horizontal members of cabinet frame.
|
|
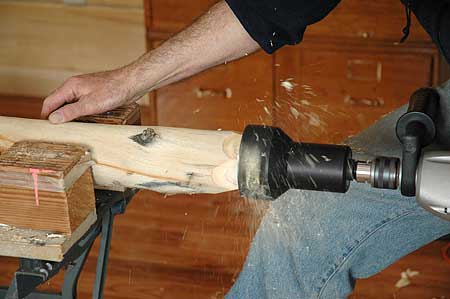
Tenon Cutting
Here's the tenon cutter at work.
I have two tenon cutters. One makes a 2" tenon; the other makes a 1" tenon. They are a Veritas product from Lee Valley tools. They install in a 1/2" drill. When applied to the end of a log the stainless blade cuts off spirals of wood until you have a tenon of the appropriate size and length.
|
|
The Tenon
This tenon is halfway done. I trimmed off more wood from the log and made a second pass with the tenon cutter.
|
|
Counter Support
The various parts have been completed, assembled and fit. The wall-side vertical is screwed into the wall. I have made a assembly of 2x4's which further binds the logs to the wall. This wall also supports the floor of the counter.
You can see 2x4 support attached to the wall. These were installed a long time ago, when I prepared the other cabinets and finished the walls to pass inspection.
Recylcing notes: the plywood panels on the wall were found behind my neighborhood Whole Foods; I think they covered shipments of vegetables.
|
|
Counter Support
These horizontal supports are made of 2x6 fragments. They are held in place by Simpson Strongtie products which I buy at my local Home Depot. They come in a variety of styles. They are especially useful for the improvisational cabinet maker, allowing you to create strong construction without perfect carpentry. Log framework is very flexible and changes its geometry during installation; the Strong-ties accomodate this imprecision.
I used 2x6's to serve as a broad base for the improvisations needed to hang drawers and drawer-slide hardware at a later date.
|

|
Install the Counter Top
I prepared the counter top in the city. It has pine and cedar trim on its edges. It is fastened using metal hardware.
You can see one disadvantage of waiting three and one half years to purchase a second 4x8 of birch veneer plywood. This new one is very light and does not have the complex grain of my first two counters. Perhaps it is not a disdvantage. The logs all vary in color; why not the engineered wood too?
|
|
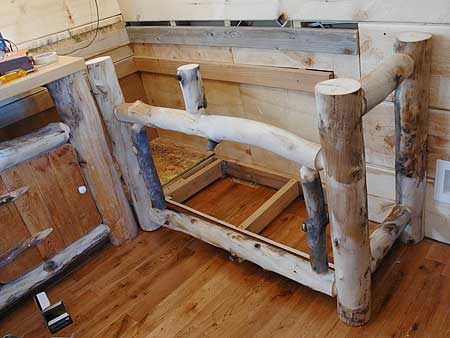
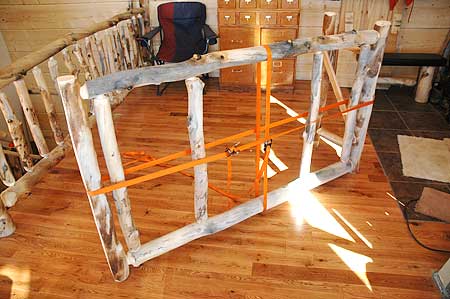
The Upper Cabinet
I built this framework in November. Now it was time to install it.
Only the small end assembly (on the right) is structurally rigid. It has a triangulated bar made of oak flooring scrap. This geometry keeps front-right corner post stable as it hangs free in space.
|
|
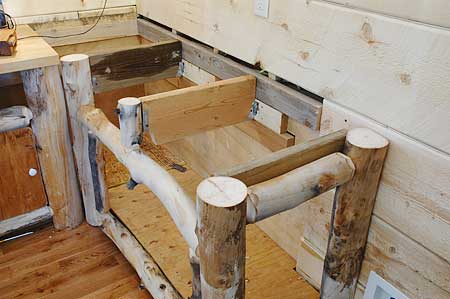
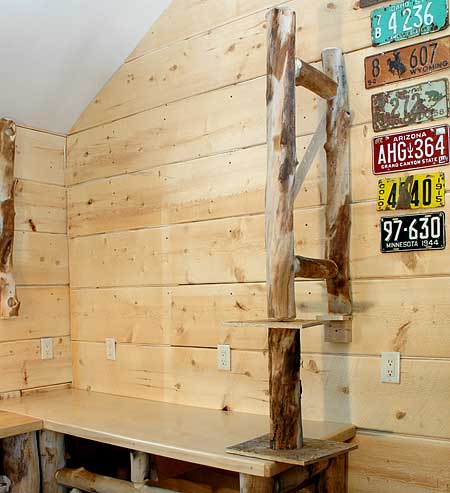
The Upper Cabinet
I design a lot while lying awake in bed. And at the same time I practice how I will do things I have never done before. This upper cabinet required a lot of thought, but when the moment arrive I suddenly knew what to do: create hanging jigs.

I made two little ones that I screwed temporarily into the wall. I also made a special platform-style jig out of log and scrap board to hold the free-floating corner post.
The wall planks in the cabin are held up by pneumatically-driven nails. I added lots of 3" screws though the planks into studs, to reinforce the adhesion of the planks to the walls. Then I screwed the suport logs into the planks, using a number of large-diameter screws.
|
|
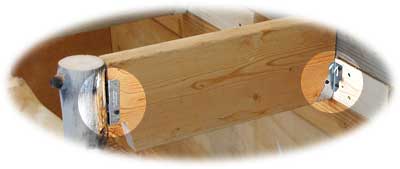
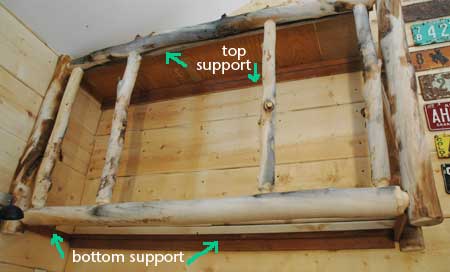
Upper Cabinet
Supporting the Top and Bottom
Spruce scraps are attached to the wall and to the horizontal logs.
The top of cabinet has thin plywood scraps which form the "roof" of the cabinet. The bottom is fill in with birch vener playwood scraps. The larger piece came from making the counter top; I prepared and varnished it while hanging this cabinet. The other piece wall already varnish; it came from cutting a hole for the stove top in the opposite counter.
|
|
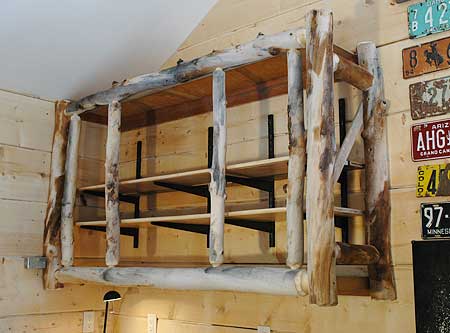
Upper Cabinet
Interior Shelves
Two shelves hang on Rubbermaid Twin-track shelving brackets. I prepared the two shelves in the city. I had a fragment left from making the counter. I made one 15" shelf and one 9" shelf from the 24"x72" fragment. They both have rounded cedar trim on the leading edge. To fill in the 6" gap left on the backside of the upper shelf, I reached into my stash of recycled shelves and desktops (all pulled from my city dumpster). I cut up some wood-veneer particle board, joined them rapidly with boards and screws, and placed this 5-minute shelf-stretcher in back of the nice shelf.
|
|
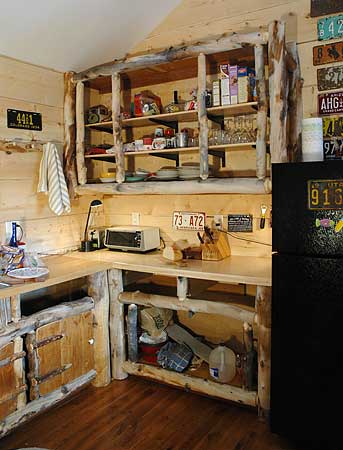
The Fridge-side Cabinets
March 08
Here are the cabinets, on the job at the end of installation day.
|
|
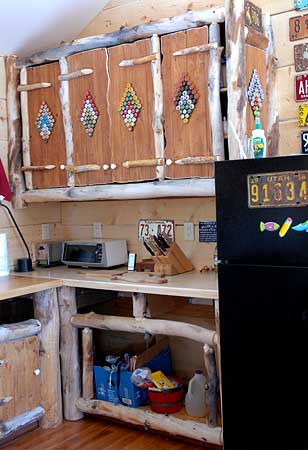
Fridge-side Cabinets
April 08
I made the cabinet doors in my city studio. I brought them up, made new pine-twig hinges, and then installed the doors. I also installed the bottle-cap medallions for the upper-cabinet doors. I had made them in the city.
There is more
I have installed the lower-cabinet doors. The two drawers are also done. |
